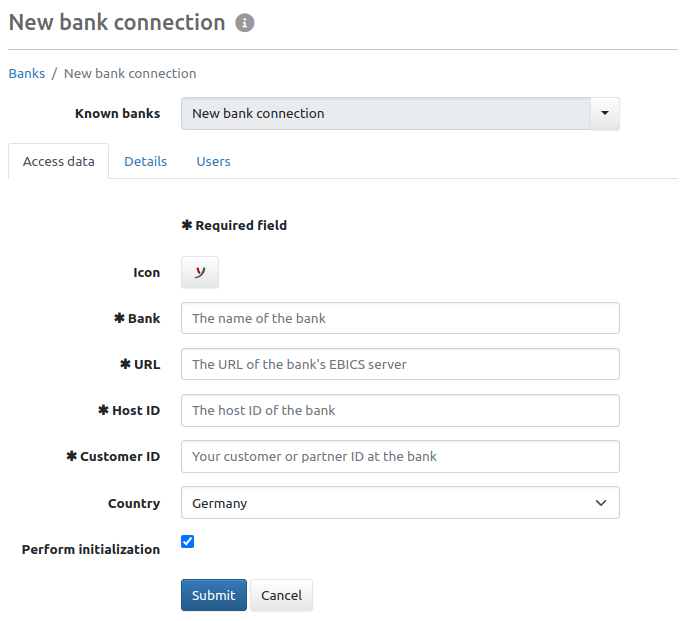
Figure: Entering a bank connection
Administrators and managers can create new banks with which they have at least one account and EBICS access. On this page you enter the EBICS access data that you have received from the bank. All mandatory fields are located on the tab Access data, further details are distributed across the tabs Details and Users.
When editing later, the information from Access data and Details is summarized on the first tab Bank details.
If you have already selected a known bank as a template in the overview, most of the fields are already filled in. If not, you can select a template now. Adjust the details from the template to the current data you have received from the bank.
The assignment of the bank to a tenant is mandatory, unique and cannot be changed later. The DEFAULT tenant is always suggested, even if a template is used. If several tenants are set up in your installation, assign the correct tenant. If the Tenant does not yet exist, it must be created first.
An icon identifying the bank is displayed on accounts, statements, orders, etc. Some well-known banks have their own logo. The Business-Logics logo is suggested as a neutral icon. Alternatively, there is a bank icon in different colors. Click on the set icon to open a dialog box and select the desired icon. The assignment can be changed later.
The bank is displayed in the application under the name assigned here. You can freely assign this name or change the name of the template as required.
These details are not freely selectable, but are assigned by the bank and must be entered accordingly:
Germany, France, Switzerland and Austria, the member countries of the EBICS COMPANY (EBICS SC), are currently selectable. The EBICS country variant varies in details, for example in send and fetch parameters. The geographical country information from the bank's address data will be displayed later on the tab User profile.
By default, Initialization starts immediately after saving the new bank, for which you need a participant ID. Switch off the checkbox to create the bank without initialization. Assigned users can initialize themselves at a bank by selecting the bank in the overview and selecting More actions – Do initialization.
The most frequently used fetch schedule is created with the bank by default and a user is automatically assigned, fetch time Monday to Friday at 06:00 a.m. Uncheck the checkbox to create the bank without a fetch schedule. All users can create Fetch schedules for the banks assigned to them and edit fetch schedules with automatically assigned users.
When using a bank template from the list of known banks, the values for the details are taken from the template. You must match the entries with the values of the access data provided by the bank:
Protocol version
Version of the EBICS specification on which the communication between the client program and and the bank is based. The possible selections depend on the EBICS life cycle. Two versions are currently valid, the current version 3.0 (H005) and the older version 2.5 (H004). Obsolete EBICS versions such as 2.4 (H003) can no longer be selected. The protocol versions supported by the bank are listed in the access data that you receive from the bank. A new bank is created with version 3.0 by default.
Clicking on the button Determine at the end of the field sends the technical order type HEV to the bank server to determine the supported EBICS versions. An error message below the field may be displayed if the selected version is not supported. It is advisable to select an older version only if the bank does not support any other version. You can subsequently perform Switch protocol version.
Hash values
Character strings for encryption and authentication key. The version of the keys can vary depending on the EBICS protocol version. There is currently only one version, E002 for encryption and X002 for authentication. Copy the hash values from the bank's electronic access data document to avoid transfer errors. If there are deviations between the expected and found hash values, you will be prompted to correct them, see Update bank keys.
A new bank is assigned to all users by default. Users with a bank connection can initialize themselves with their access data after adding the bank. If you want to assign the users later, you can deselect all but one when creating the bank. You can edit the assignment of users in the bank details under Users with further options or in the user administration under Bank selection. There you can enter the participant IDs for users with a bank connection. If you do not assign the bank to yourself, you will not see a user profile in the bank details.

Figure: Entering a bank connection