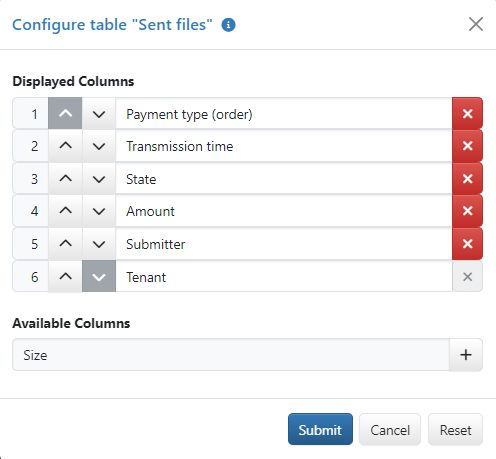
Figure: Example of a dialog box for column configuration
Overviews are organized in tables with columns that each user can personally arrange, show and hide. When an overview is called up for the first time, the default configuration of the columns is displayed.
The button Submit at the bottom of the dialog box saves your changes. The button Reset restores the default configuration. A reset must also be saved with Submity.
The upper list shows the current column configuration offset, i.e. in rows instead of columns. The lower list is only available if there are columns that can be displayed additionally. In most overviews, all available columns are displayed by default. In this case, columns that you have previously removed from the view become available.
The number at the beginning of the row corresponds to the column position from the left in the overview. To move a column further to the right, click on the down arrow next to the column name until the desired position is reached. To move a column to the left, click on the up arrow.
To remove, click on the red X behind the column name. If the X is gray, the column cannot be removed from the view. To add, click on the plus sign behind the name in the list of available columns. The column is added at the last saved position and the following columns are moved one column to the right.
User preferences enable you to change your personal default for certain overviews, e.g. for the account overview. After changing the user preferences, the button Reset applies your personal default. After loading the default values in the user preferences, Reset applies the general default configuration again.

Figure: Example of a dialog box for column configuration