Figure: Configuration of the database
After the installation, a Super administrator must configure BL Banking Web for the first time. To do so, you need a license for the application from Business-Logics, and the access data for the EBICS connection from your bank. Moreover, your bank must set up an EBICS access for you, which must be in the state not initialized.
To start the setup, call up the application in a web browser. If you are on the computer, where the application is installed, select the appropriate folder from the start menu and then click on BL Banking Web. Instead, you can also start a web browser and enter the address https://localhost/setup there. You can also perform the configuration from a remote computer. In that case, enter the IP address or the name of the server instead of localhost in the browser.
On the first page, the connection to the database is specified. The fields are filled in with the data from the supplied H2 database. If you want to use this, all you have to do is enter a password of your choice and click on Set up database. However, it is recommended to use an external database. This must be installed and set up by yourself. In the field JDBC URL, enter the address of your database. For this purpose, use the format suitable for the respective database:
MySQL/MariaDB: jdbc:mysql://<hostname>:3306/<dbname>
MS SQL Server: jdbc:sqlserver://<servername>:1433;databaseName=<dbname>
Oracle: jdbc:oracle:thin:@<servername>:1521:<dbname>
PostgreSql: jdbc:postgresql://<hostname>:5432/<dbname>
Below that, enter the username and password of the external database you set up earlier. For MS SQL Server, you can enter the Domain User ID instead.

Figure: Configuration of the database
You must now set up the first user. To do this, click on Set up user. On the following page, enter the license code you received from Business Logics for your installation. The license code contains information on validity, the access data for the standard bank and the maximum number of users who may be granted bank connection.
After successful verification of the license code, enter a name and a password in the following step, with which the user can log on to BL Banking Web. The name to be assigned here is independent of the subscriber ID.
You can optionally create the user without bank connection. To do so, set the checkbox below the input fields. In this case, the setup of BL Banking Web is complete and you will be redirected to the main page of the administration interface.

Figure: Entry of the user
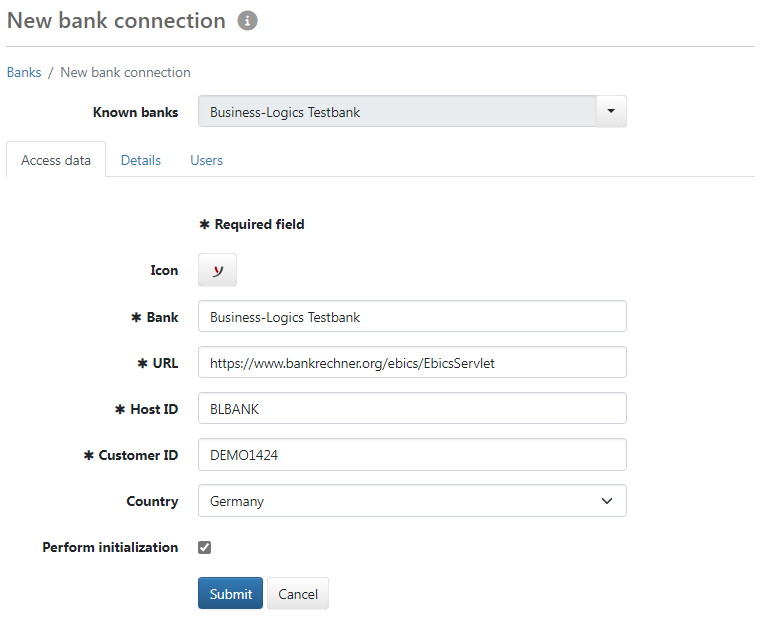
Now enter the access data, which you have received from your bank. If these were already entered in the license, you do not need to do anything here, as the fields are preset accordingly. You may have to enter further data of the bank connection in the Details tab. You will also receive this data from the bank. If you deactivate the checkbox below the input fields, only the bank connection will be created, but the subscriber will not be initialized.

Figure: Configuration of the bank
On the next page, you must enter your subscriber ID, unless it was already given in the license. The preset data for the signature version and the keys can be kept unless the bank requires certain values. Please note that the subscriber must be reset at the bank. This is usually the case for newly created subscribers. When you click Initialize, a dialog box appears where you enter the password that you assigned yourself when you created the user. After that BL Banking Web will try to perform the initialization at the bank. If this was successful, a new page will be loaded where you can download the initialization letter as a PDF file. You will need to sign this and send it to your bank.
After the initialization, the bank access is in the state Not yet activated and therefore cannot yet be used. As soon as the bank has received the signed INI letter and released the bank access, the state changes to Ready. This is displayed in the overview when updating the bank access. BL Banking Web is then ready for use.

Figure: Status of the bank